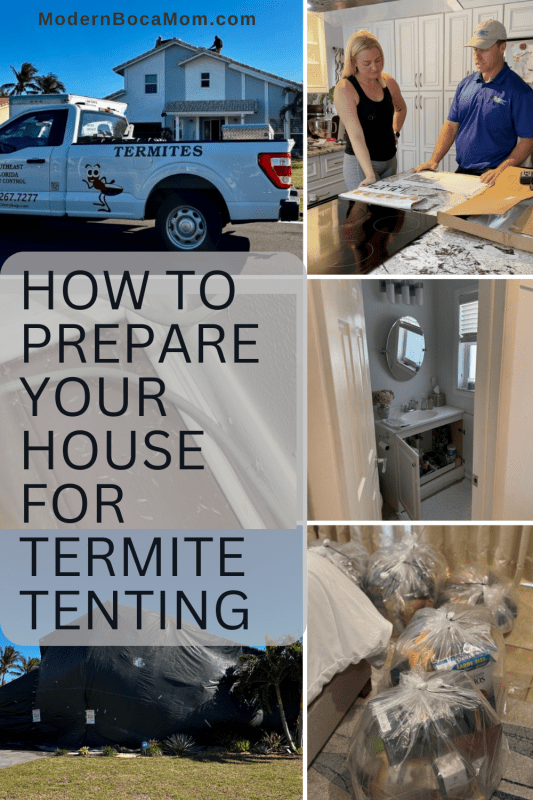
If you live in Boca Raton or really anywhere local, South Florida termite tenting is something you might have to face at some point. Drywood termites are unfortunately (and annoyingly!) a common issue in our warm and humid climate, and they can cause significant damage to homes if left untreated. I was dreading having to deal with a drywood termite infestation, but when we started noticing tiny holes in our crown moulding and baseboards, followed by swarms of termite wings on the floor (so gross!!!), I knew we had a problem.
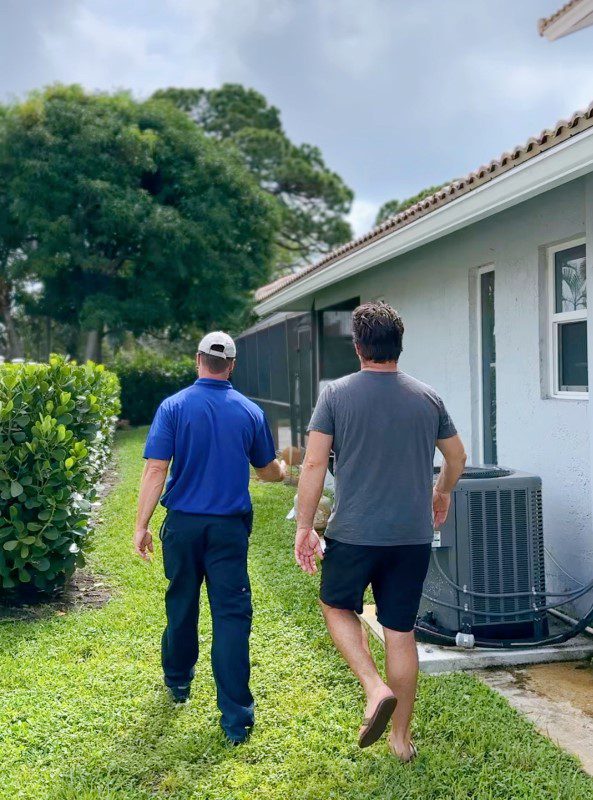
That’s when we called the experts at Southeast Florida Pest Control, and I’m so glad we did! Their excellent customer service and professional approach made the entire termite tenting process relatively smooth and stress-free. If you’re currently dealing with termites or want to prevent a future infestation, here are my best tips based on our personal experience.

Step 1: Get a Free Termite Inspection
The first thing we did was schedule a free termite inspection with Southeast Florida Pest Control. Their team (shout out to John!) came out promptly and confirmed our biggest fears: we had a drywood termite infestation. Unfortunately, drywood termites don’t need soil to survive—they burrow into wood (basically the whole second story of our house) and create entire colonies inside your walls, furniture, and even structural beams. Over time, they can cause significant damage, so early detection is key.


If you notice any of the following, don’t wait to take action—call a pest control company like Southeast Florida Pest Control ASAP:
- Small, pin-sized holes in wood surfaces
- Discarded termite wings (often found on windowsills, closet shelves and the floor)
- Hollow-sounding wood when tapped
- Termite swarm sightings (especially in the spring and summer)


Step 2: Prepare for Tent Termite Treatment
Once we confirmed that termite tenting was necessary for our issues versus spot treatment, our family had to start preparing. This was probably the most overwhelming part of the process, but thanks to Southeast Florida Pest Control’s clear checklist and guidance, it was pretty manageable.
Here’s what we had to do before the tenting:
- Double bag all food and medicine in special fumigation-safe bags provided by the company
- Remove all pets and plants from the home
- Open all drawers and cabinets to ensure the gas reaches every nook and cranny
- Unplug electronics and shut off gas lines (if you have one)
- Find somewhere to stay for at least 3 days (we opted for a wonderful getaway to the World Equestrian Center in Ocala, FL!)
- Take down any screens in your pool enclosure that would prevent the tent from dropping down fully along the house
- Trim back any landscaping that touches your house. Several of our plants were fumigated under the tent because they were too close and had to be replaced later on

While the prep work takes a bit of effort ahead of time, it’s necessary to ensure a successful fumigation. We also took this opportunity to declutter and deep clean many areas of our house, which made moving back in even easier!

Step 3: The Termite Tenting Process
On the day of our tent termite treatment, the crew arrived early to set up. It was fascinating to watch them drape our entire home in a massive black tent, sealing every corner to make sure the treatment would be effective. They used Vikane gas, a powerful fumigant that penetrates wood and eliminates termites at all life stages.

Here’s what happens during fumigation:
- The home is completely sealed with a tent
- Vikane gas is pumped in to eliminate every termite inside
- The gas remains in place for a set period to ensure full extermination
- After the required time, the tent is removed, and the home is aerated for safety

The entire process took three days, and while it was strange to be away from home, we felt reassured knowing that the experts at Southeast Florida Pest Control were handling everything.

Step 4: Moving Back In & Preventing Future Infestations
When we got the all-clear to return home, we were thrilled! The house was termite-free, completely safe, and exactly as we left it. No lingering odors, no residue—just peace of mind knowing that our biggest investment was protected.
To prevent future drywood termite infestations, we’re following these expert tips going forward:
- Schedule regular termite inspections (at least once a year)
- Keep wood surfaces sealed and well-maintained
- Minimize moisture buildup around the home
- Be on the lookout for termite swarms, especially in the spring
Why We Recommend Southeast Florida Pest Control
If you’re in South Florida and dealing with termites, I can’t recommend Southeast Florida Pest Control enough. They did a great job, providing expert advice, clear communication, and top-notch service. Termite season starts in March, so if you suspect an issue, don’t wait! Schedule your free termite inspection today and protect your home from costly damage.

Termite tenting might not have been on our vision board for this year, but I’m so grateful we took action when we did. Thanks to Southeast Florida Pest Control, the process was easier than expected, and our home is now termite-free.
If you live in Boca Raton or South Florida, take termite prevention and control seriously—because these tiny pests can cause significant damage before you even realize they’re there!
Have you ever dealt with termite tenting? Share your experience in the comments!
Disclaimer: Modern Boca Mom received a discount on termite tenting with Southeast Florida Pest Control for review purposes. We are so grateful for this partnership!
Pin for Later!